I know teachers’ brain never really turns off and you might be thinking of ways you want to change your teaching for the upcoming school year. Maybe you are looking to add more structured literacy into your classroom or are focusing on a particular area like vocabulary. Here are 5 completely free ways to improve your teaching.
1. Use the Real Words
Often we like to cutesy up words and phrases to make it catchy for students. Sometimes we do this to add in fun, but sometimes I think we do this because we don’t think our students can handle the real terms. Believe me, they usually can and oh do they enjoy using them.
What I mean is it is okay to teach your students words like: diphthong, voiced, unvoiced, r-controlled, nasal sounds, text-to-text connection, comparison, phoneme, grapheme. Students will use these words. I have had students comment on each other’s thoughts by saying “That was a great text-to-self connection.” And “Wait, what is another grapheme for long I?” Using such words can empower them.
According to research done by Gamez & Lesaux, 2012 found that when teachers use more sophisticated vocabulary it results in a positive and significant effect on students’ vocabulary growth. So essentially by elevating the words we use, we are elevating the words are students will use.
2. Set Explicit Targets and Scales
One of the schools I taught at provided lots of professional development based on Anita Archer, which if I’m being honest, at the time, was not my favorite. It turned out to be one of the best tools I had when I started virtual teaching.
Stating the target explicitly before every lesson so students would know what we were focusing on was crucial with limited time. It also helped to better direct my teaching. When I had to put a whole day of learning into three hours this was a must.
I know you are probably already doing explicit targets and lesson goals. It took it up a level when I added in scales. These scales helped students see where we were going with a skill. Using scales benefits students on the lower and upper ends of skill. They could see what they could focus on if they already knew what the lesson was addressing or what to focus on if the lesson was challenging. It validated each of their abilities.
This required more prep on my end to take a look at what the lesson goal was and how the skills built upon each other, but added clarity for everyone. I used the stars to show what the goal or goals of that lesson to help students focus on what they were expected to work on.
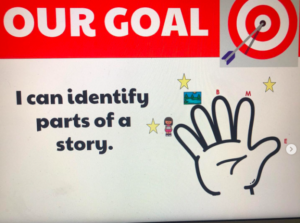
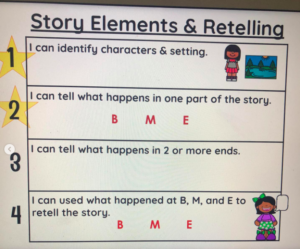
Here is an example of what I had for story elements and starting to retell a story, which is a skill we work on a lot in Kindergarten and 1st grade.
3. Don’t Be Limited By What You Don’t Know
We don’t know it all. Often we would like to. We would like to be completely knowledgeable about something before teaching it (and yes, there are things we need to be), but a lot of what goes into structured literacy instruction we wouldn’t be. That’s just a fact. Waiting to be completely ready deprives are students from something they might need.
I can almost guarantee if it is along the lines of structured literacy you won’t be doing any harm to your students. This allows you to keep learning and adapting to make it better and better.
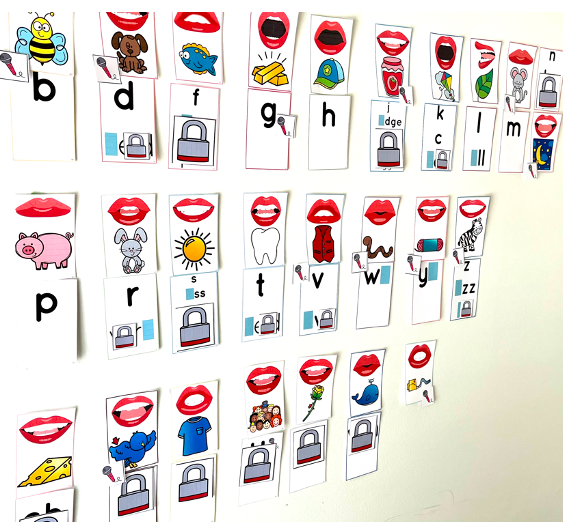
About 8 or 9 years ago I switched to a sound wall. There were very limited resources at that time. So for the first two years, the sound wall didn’t look like it should have. It was not organized by types of sounds or by point of articulation because I didn’t know all of that enough to teach it. I organized it by groups of sounds that went together. One year it was truly in alphabetical order (which I know is completely frowned upon). Yet those years I still focused on how to make the sounds, especially emphasizing voiced and unvoiced. I taught my students how to use it to help them. Guess what? My students used our “sound wall” during writing time and small group time. I would find students putting their hands on their throats to check for voiced and unvoiced sounds. They used it to check spellings of a sound. It worked for us almost as well as a traditional sound wall.
4. Involve Students When You Can
Students love pointing out their work! Let’s be honest we all do. Involving them in classroom displays, anchor charts, and posters is a great way to help them remember to notice and actually use them.
Easy ways I love to do this:
- Have students make examples to add to an anchor chart.
- Use sticky notes to have students add to anchor charts
- Have students color/decorate words for bulletin board display/schedule cards
- Have students color a number for your calendar
- Have students help make a classroom birthday display
- Have students decorate a seasonal tool they will be using (think bookmark, word mapping tool, 100s chart)
- Have students add examples to alphabet, math, or phonics display
- Add photos of students to classroom rules or expectations for small groups
My last year in first grade, the amount of time we spent analyzing how many birthdays were in each month was a daily thing for a couple weeks all because students designed their own cupcakes and helped put the display up. We easily tied comparing number of birthdays to what we were working on in math.
5. Just Start…
My last year in first grade, I knew I was leaving in December for maternity leave. So rather than doing anything fancy, I used index cards along with a black and red marker for heart words. After introducing the words we were focusing on, students would help direct me to where the heart should go on the word. We would review the word the next day and put it on our easel in the front of the room. The next week those words would get put on our heart word wall that was not evenly spaced out and lacked headings, but the words were grouped by sounds. It worked for us! Your classroom doesn’t have to be completely put together.
Want To Try One?
I hope you have found at least one of these ways helpful to your teaching. Because I believe so much in having students help create the classroom displays, I have phonics posters that you can use to do that. I loved using these with small groups! After teaching a sound, I would have students add a picture and word that matched the sound to the poster. It was a really good informal assessment to see how well they knew the sound. These posters could also be used for a class book or as posters to use for a quick picture or word sorts.


Leave A Comment